How to get a free SSL certificate using AWS and how to use it on CloudFront?
In today’s digital age, securing websites and applications with SSL/TLS certificates has become essential. Amazon Web Services (AWS) provides a convenient and cost-effective solution for managing certificates through its Amazon Certificate Manager (ACM) service. With ACM, you can easily create, manage, and deploy SSL/TLS certificates for free, eliminating the need to purchase certificates from third-party vendors. In this blog post, we will walk you through the steps to create free public certificates in AWS ACM.
Getting Free Public SSL Certificates
Step 1: Accessing AWS Certificate Manager (ACM)
Log in to the AWS Management Console (https://console.aws.amazon.com/).
Navigate to the ACM service by typing “ACM” in the search bar and selecting “Certificate Manager” from the list of services.
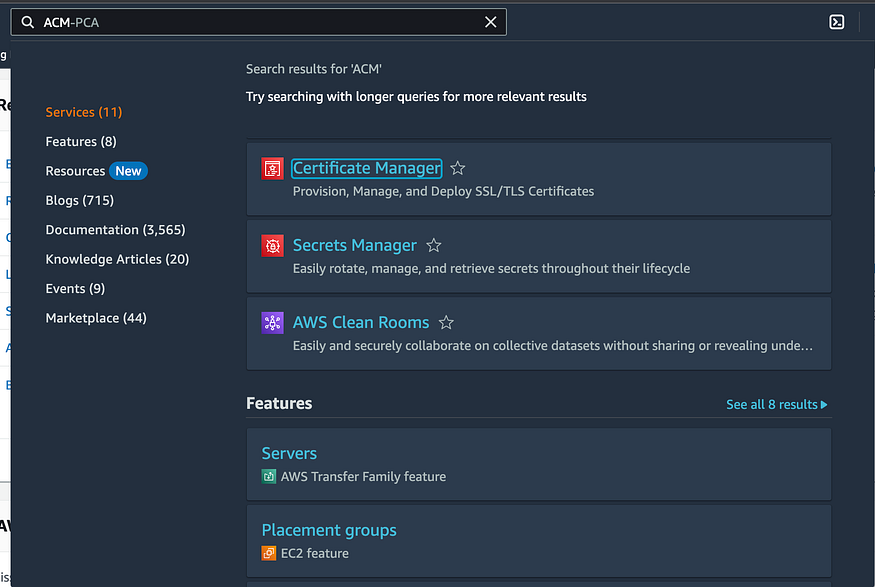
Step 2: Requesting a Public Certificate
In the ACM console, click on the “Get started” button under “Provision certificates”.
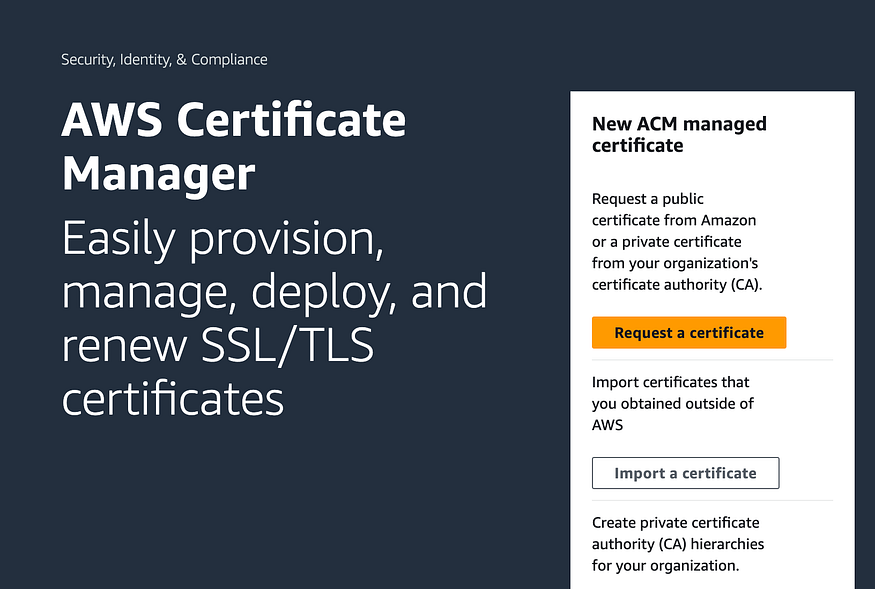
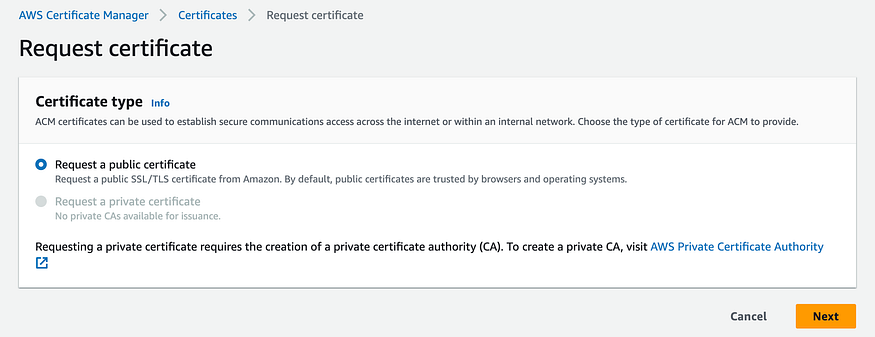
Choose the “Request a public certificate” option.
Enter the domain name(s) for which you want to request a certificate. You can specify multiple domain names using a comma-separated list.
AWS ACM provides two options for domain validation: email validation and DNS validation. Choose the appropriate method based on your requirements and click “Next”.
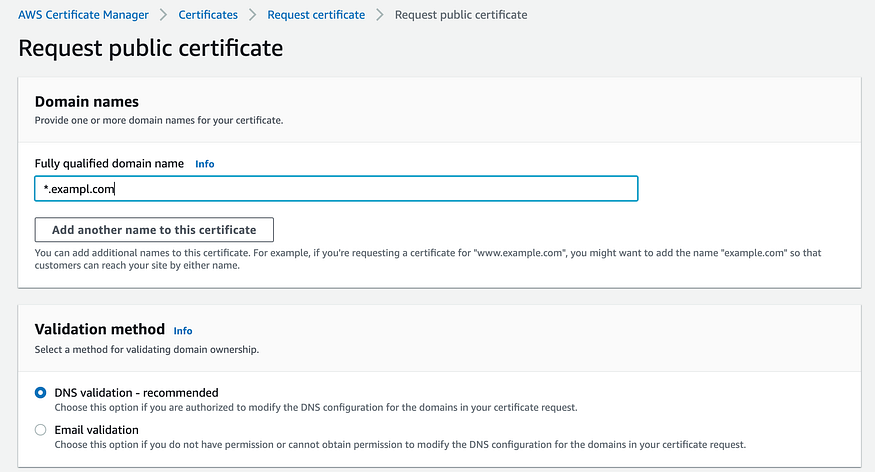
Step 3: Validating Domain Ownership
If you choose email validation, AWS will send an email to the domain owner’s email address associated with the WHOIS record. Follow the instructions in the email to validate ownership.

If you choose DNS validation, AWS will provide you with a CNAME record to add to your domain’s DNS configuration. Access your DNS provider and add the CNAME record. It may take some time for the DNS changes to propagate.

Step 4: Review and Confirm
After successfully validating domain ownership, review the certificate details, including the domain names and validation method.
Ensure that all the information is correct, and then click on “Confirm and request”.
Step 5: Deploying the Certificate
Once the certificate request is approved, it will appear in the ACM console under the “Pending validation” status.
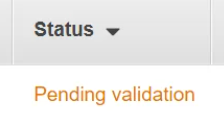
Once the status changes to “Issued”, you can use the certificate in your AWS services.

To deploy the certificate Select the services where you want to deploy the certificate, such as Elastic Load Balancers (ELBs), Amazon CloudFront, or API Gateway.
How to Setup custom domain on CloudFront and SSL
Step 1: Set up a Custom Domain
Open the AWS Management Console and navigate to the Amazon CloudFront service.
Click on “Create Distribution” to start the process.

In the “Origin Settings” section, specify the domain or origin server for your content. This could be an S3 bucket, an EC2 instance, or a load balancer.
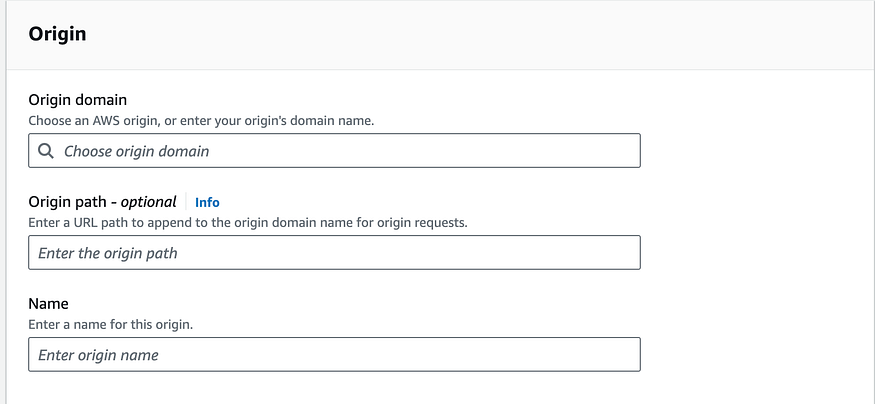
Configure other settings such as cache behavior, origin access identity, and cache TTL based on your needs.
In the “Default Cache Behavior Settings” section, you can enable HTTPS-only connections by selecting “Redirect HTTP to HTTPS”.
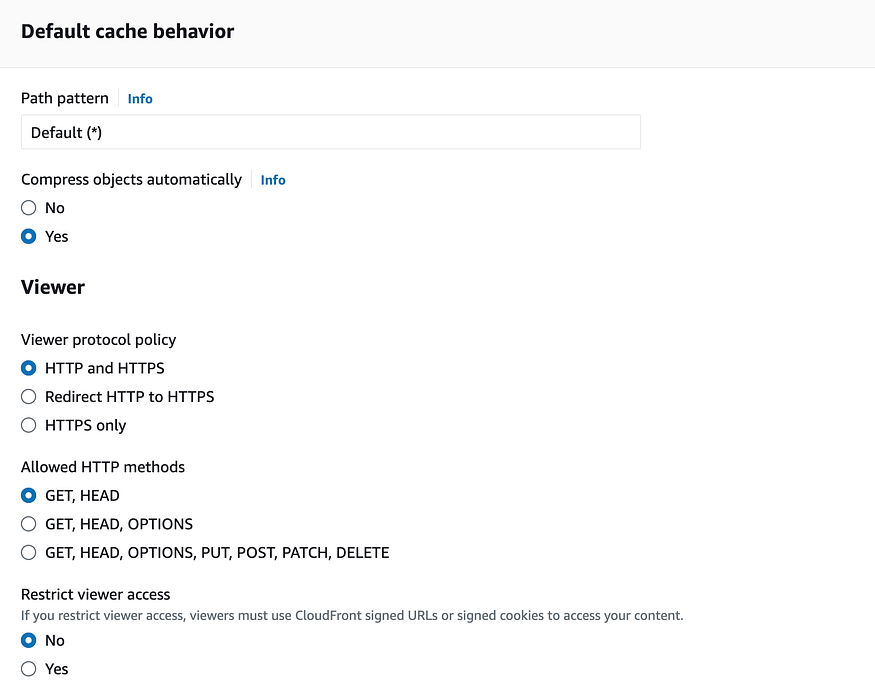
Click on “Create Distribution” to create the CloudFront distribution.
Step 2: Set Up a Custom Domain with SSL
After creating the CloudFront distribution, note down the assigned CloudFront domain name (e.g., d12345.cloudfront.net).
Go to your domain registrar or DNS provider (e.g., GoDaddy, Route 53) and access the DNS settings for your custom domain.
Create a new CNAME record with your desired subdomain (e.g., cdn.yourdomain.com) pointing to the CloudFront domain name (e.g., d12345.cloudfront.net).

Wait for the DNS changes to propagate (usually takes a few minutes to an hour).
Step 3: Configure SSL in CloudFront
- Go back to the CloudFront service in the AWS Management Console.
- Select your CloudFront distribution and click on “Edit”.
- In the “Alternate Domain Names (CNAMEs)” field, enter your custom domain (e.g., cdn.yourdomain.com).

In the “SSL Certificate” section, choose “Custom SSL Certificate”.

Select “Custom SSL Certificate” from the dropdown and paste the ARN of the SSL certificate you copied from ACM.
Configure other settings as per your requirements.
Click on “Yes, Edit” to save the changes.
Step 4: Testing and Validation
Wait for the CloudFront distribution changes to propagate, which can take some time.
Once the changes are applied, access your custom domain (e.g., cdn.yourdomain.com) in a web browser using HTTPS (https://cdn.yourdomain.com).
You should see your content served securely via CloudFront with the SSL certificate.
Comments
Post a Comment